Posted on

Craft Fair dates 2025

Caernarfon Airport Fun Day

Having had a fun and successful day at Caernarfon Airport’s Christmas event, organised by Byd Bach Events, I’ve booked in early for their Summer Fun Day at Caernarfon Airport. I’ll be there with my gazebo, so pop along and say hello!

Criccieth Craft Fair, monthly from March 2025

I will again be exhibiting at Criccieth Craft fair throughout 2025. The dates for this are as follows:

  • 1 March
  • 5 April
  • 3 May
  • 7 June
  • 5 July
  • 2 August
  • 6 September
  • 4 October
  • 1 November
  • 6 December (Christmas fair)

The venue’s location is the Memorial Hall, Criccieth, and the fairs are open to the public between 11am and 3pm. If you’d like to contact Linda, the event’s organiser, please visit the Criccieth Craft Fair Facebook page.

Christmas fairs 2025

I am booked in and confirmed for the following Christmas fairs in 2025.

I hope to be able to book into one or two more Christmas fairs, and will add them here as they’re confirmed.

Posted on

Autumn/winter fairs 2024

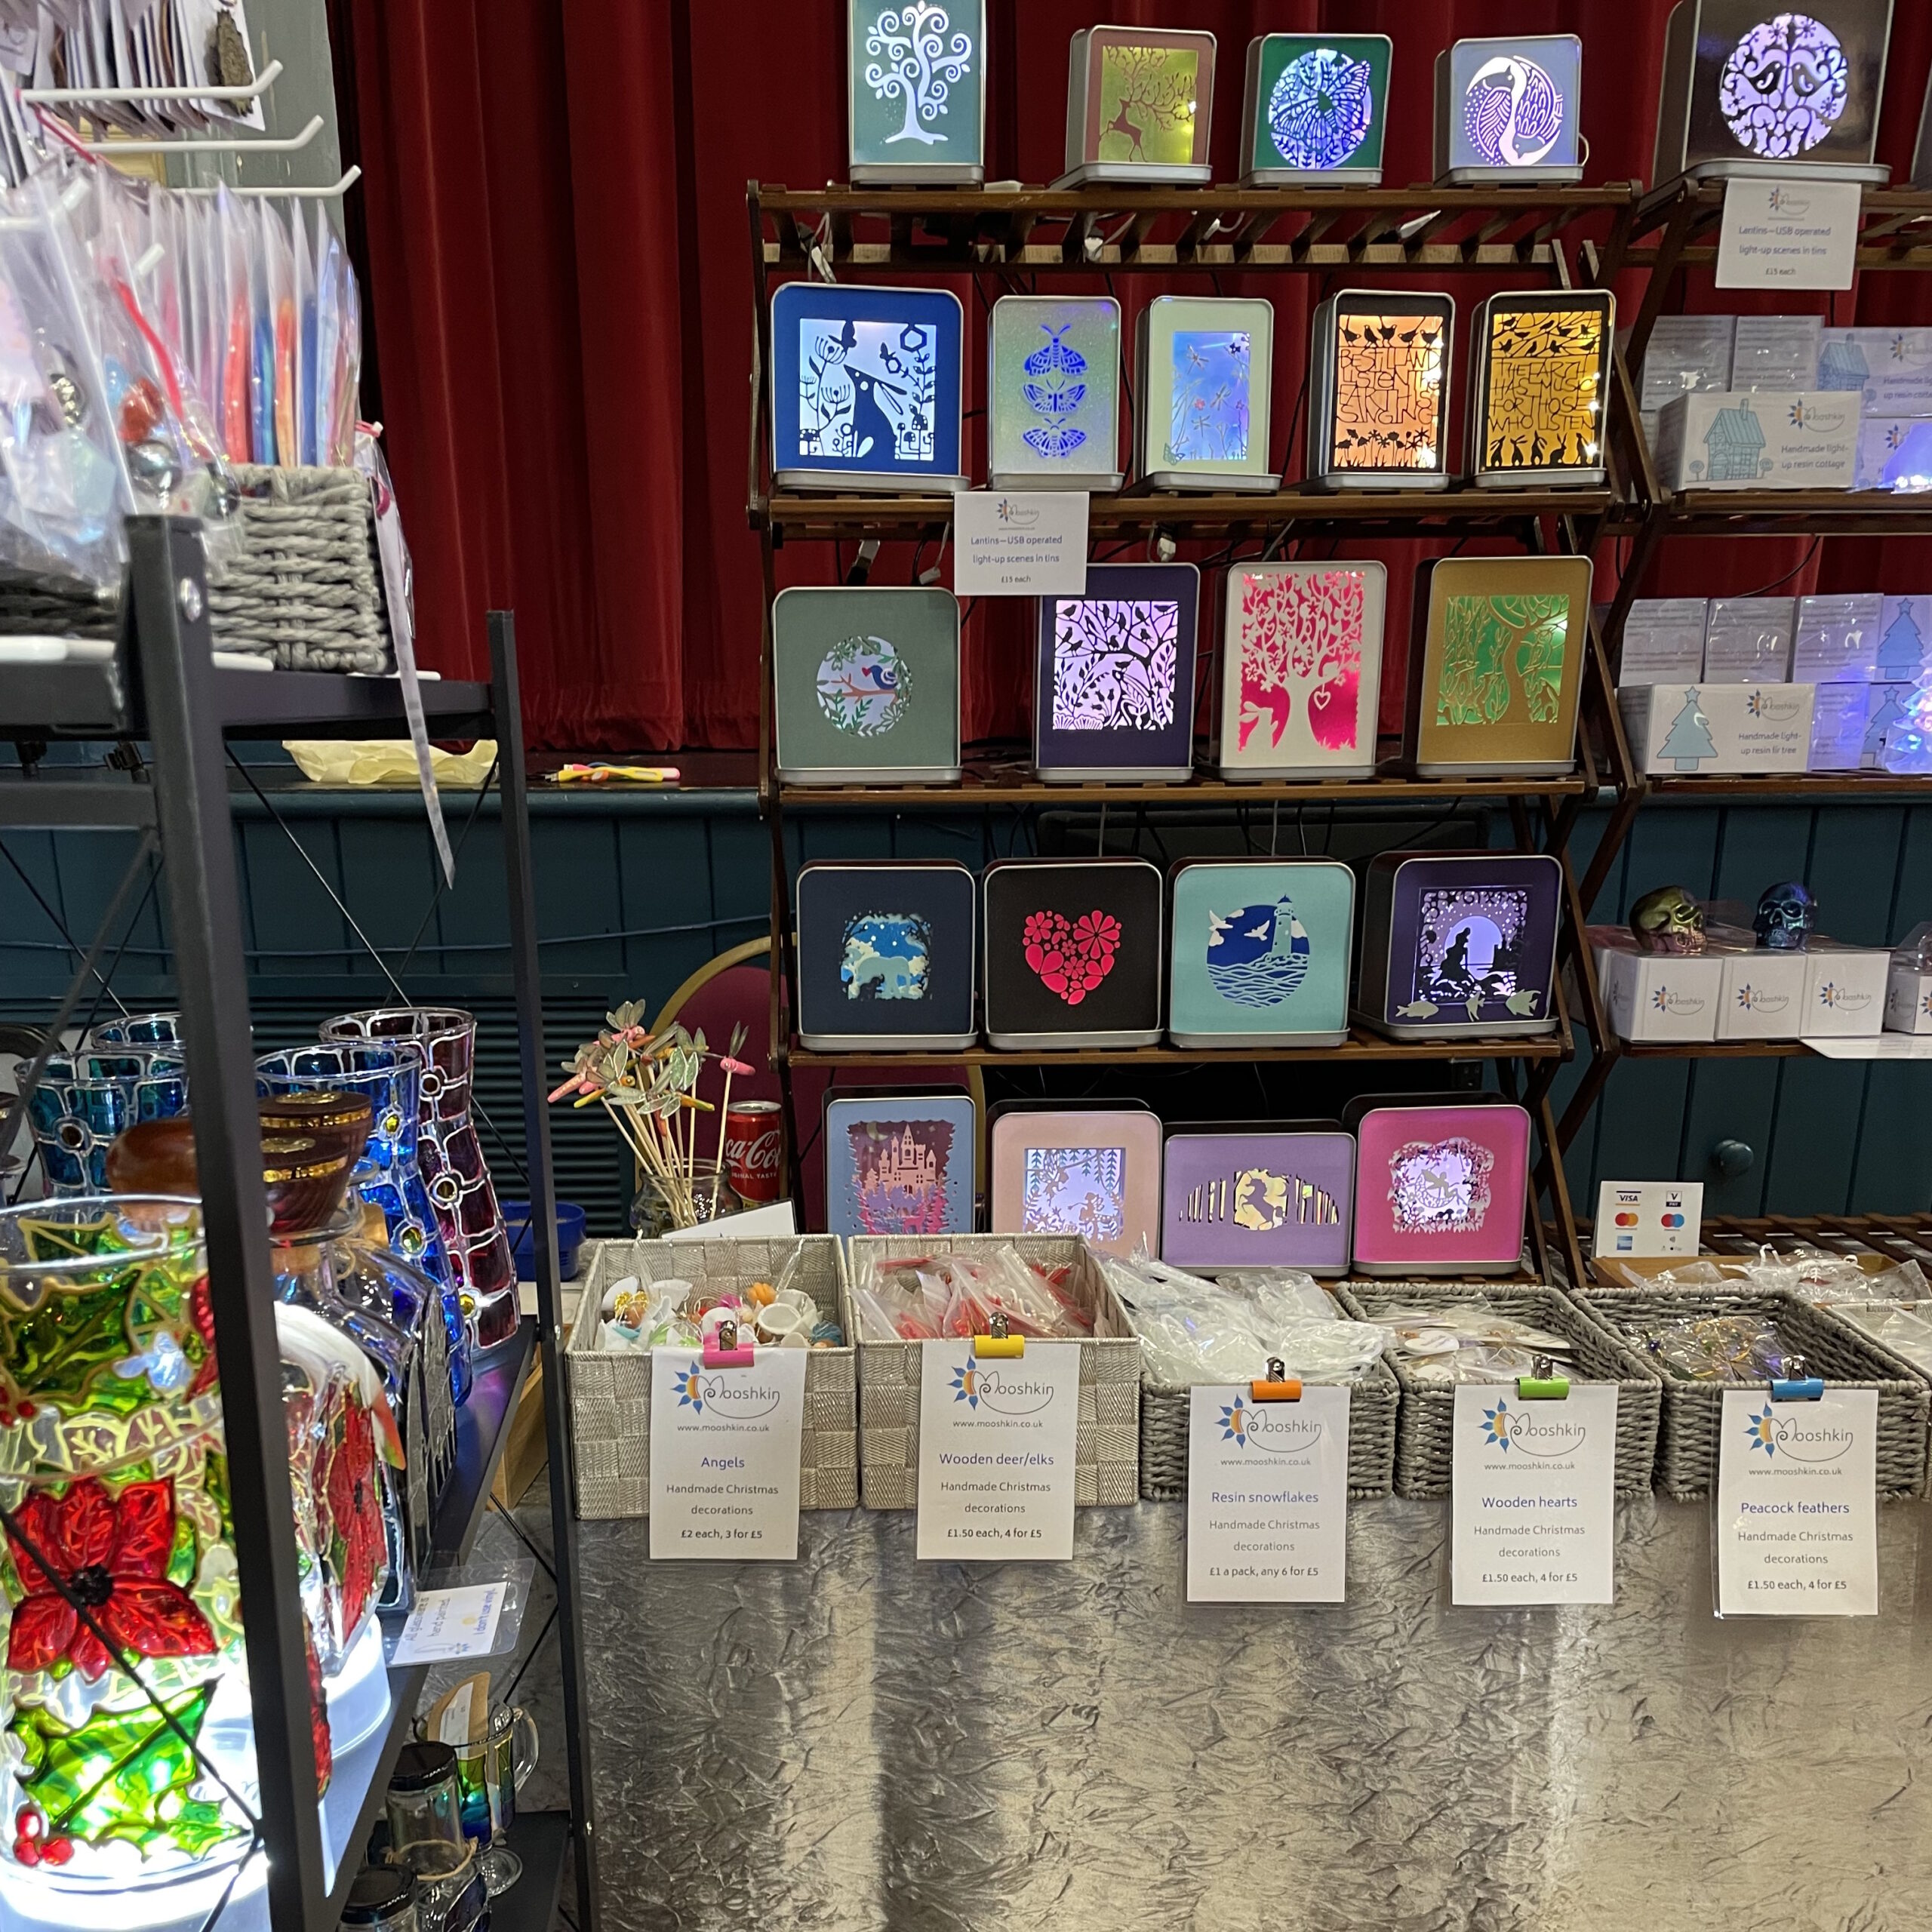
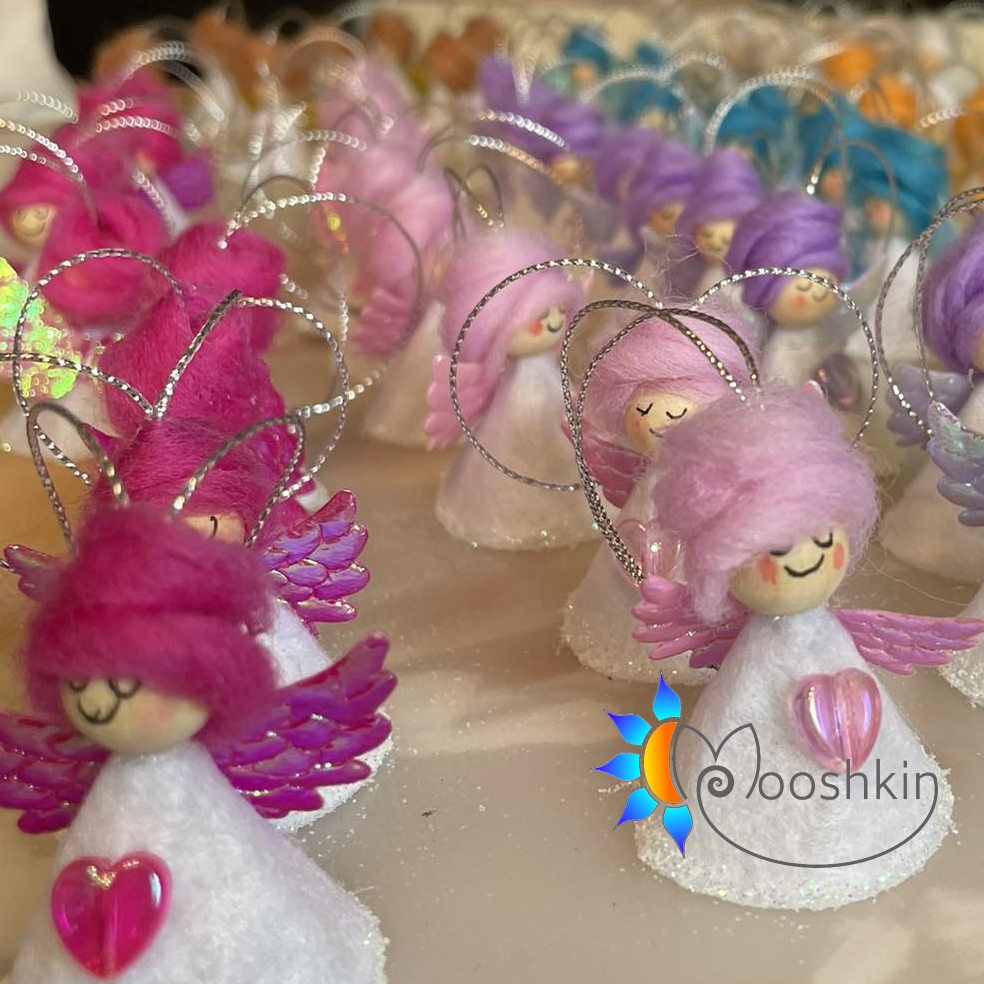
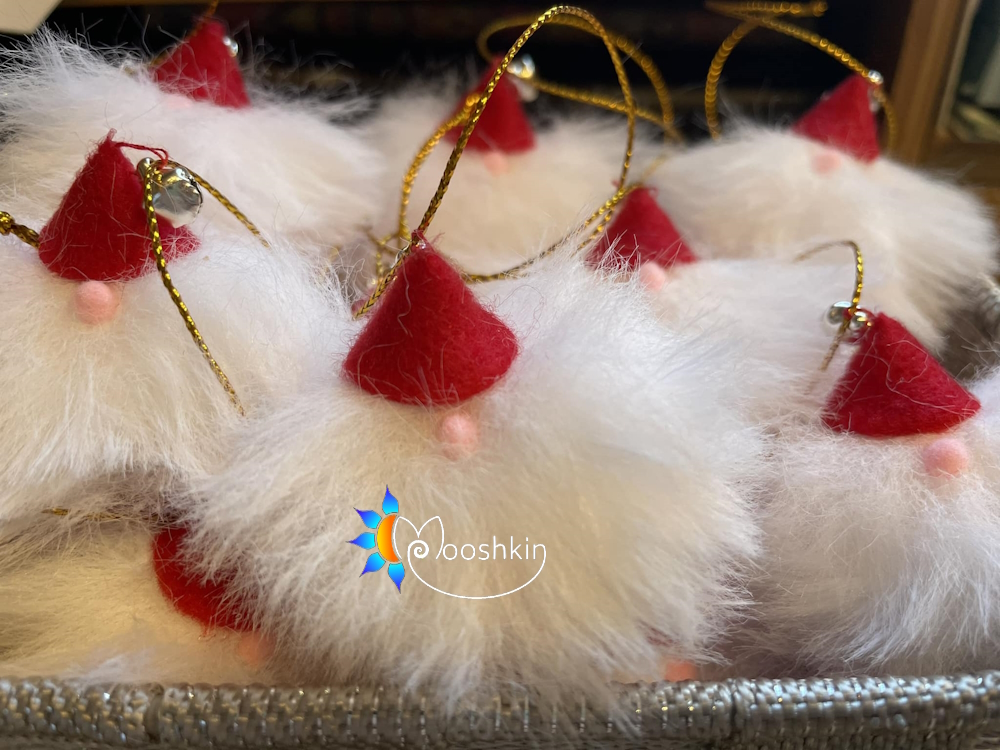
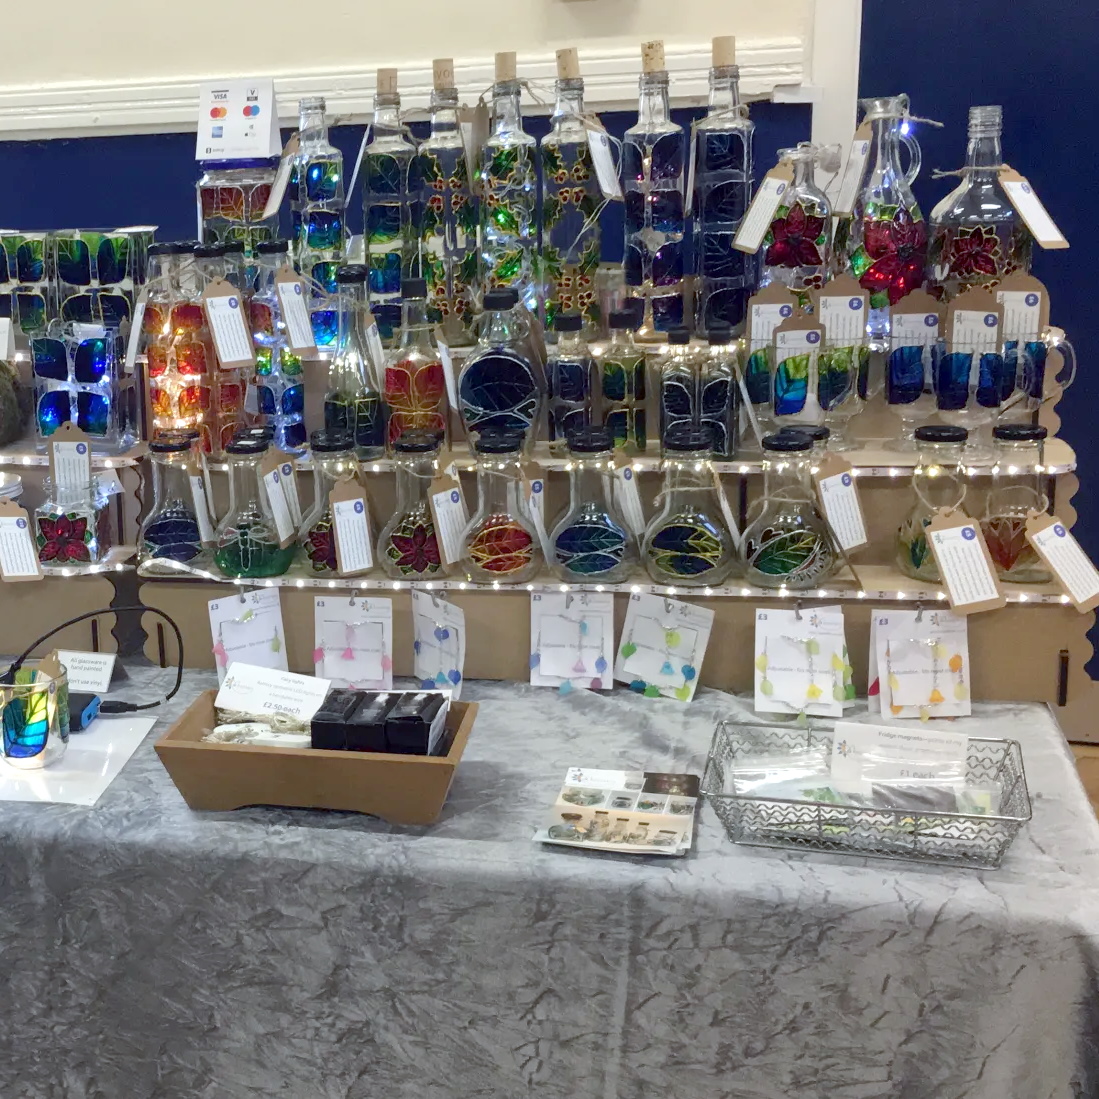
Did you know that I have a lot of products that I only sell at fairs and don’t sell on the website? Most of my Christmas decorations – including the colourful ladies in the photo above – are too complicated to upload to the website as the stock levels change so quickly with all the fairs I attend, and with so many colour variations it’s really difficult to keep website stock updated (not least because I usually only have a limited number of each variation). Also, some items really are just too uneconomical to send out by post – for example, things made of paper and card that are too bulky for a ‘large letter’ box, but weigh next to nothing, might cost me £4 to post out yet the product price is only £1.50. Further, Royal Mail won’t let me send anything that contains batteries, which in 2024 several of my Christmas items do.

Therefore, if you want to see the full range of my products, you should definitely try to visit my stall!

For the remainder of 2024, I’m booked in at the following events:

Criccieth Craft Fair

Held on the first Saturday of the month at Neuadd Goffa/Memorial Hall, Criccieth, from 11am to 3pm. Remaining dates for 2024 are 2nd November and 7th December. Find out more at the fair’s Facebook page.

Gwyl Greft a Bwyd Glynllifon Craft and Food Fair

The biggest event in my 2024 calendar, I’m really looking forward to my third year of trading at Glynllifon’s annual festive fair, which this year takes place on 16th and 17th November from 10am to 4pm. Find out more at the fair’s Facebook page.

Ffair Nadolig Nant Gwrtheyrn Christmas Fair

Another favourite event that I try to do every year if they have space for me – I really love the setting, and it’s a busy and popular fair with plenty of interesting things to see and do. Ffair Nadolig Nant Gwrtheyrn takes place on 23rd November – they haven’t announced it on their Facebook page yet so I can’t give you the times yet, but I think it runs from about 10am to 4pm.

Ffair Gaeaf Ysgol Dyffryn Nantlle, Penygroes

I’ve tried to stay away from school fairs as much as possible over the past couple of years as they don’t tend to work very well for me and my products… having said that, sometimes I’ll do them to help out a friend, and as I have a friend who’s a teacher at Ysgol Dyffryn Nantlle in Penygroes and he invited me to have a stall, I’m happy to lend my support this year. No details have been published on their website or Facebook page yet, but it’s on 28th November from 4-8pm.

Gwesty’r Celt – Celtic Royal Hotel, Caernarfon

This one’s a first for me, so it’ll be interesting if nothing else! It runs from 10am to 4pm on Sunday 1st December and you can find out more at the Celtic Royal’s Facebook page.

Posted on

Christmas fairs 2023

Looks like I’m going to have a very busy Christmas period this year, which is just as well because I’ve spent the past couple of months building up tons of Christmas stock, including things I’ve never made before (as well as restocking some old favourites!)

My diary currently looks like this:

4 November, 11am-3pm: Ffair Grefft Criccieth Craft Fair, Memorial Hall, Criccieth

11-12 November, 10am-4pm: Gwyl Grefft a Bwyd Glynllifon Craft & Food Fair, Glynllifon, Caernarfon

18 November, time TBC: Gwyl Fwyd Caernarfon Food Festival, retail units at Cei Llechi, Caernarfon

25 November, 11am-4pm: Ffair Nadolig Nant Gwrtheyrn Christmas Fair, Nant Gwrtheyrn, Llithfaen

26 November, time TBC: Beaumaris Artisans’ Christmas Markets, David Hughes Community Centre, Beaumaris

2 December, 11am-3pm: Ffair Grefft Criccieth Craft Fair, Memorial Hall, Criccieth

Please do come along and say hello if you can! And please remember that every pound spent at a craft fair is more appreciated by stallholders and organisers than you’ll ever know… my prices start at just £1 so that everyone can lend a little support if they want to, without having to break the bank.

And for the first time this year, I’m now going to say it… merry Christmas! 🙂 Feels good to be saying that again, even if it is only the first day of November! 🙂

Posted on

Criccieth Craft Fair – dates 2023

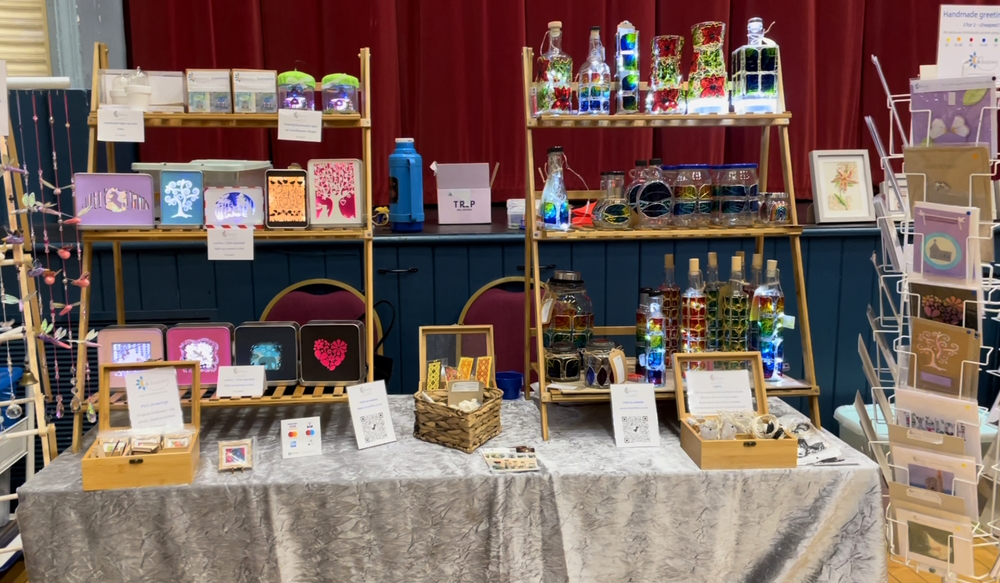
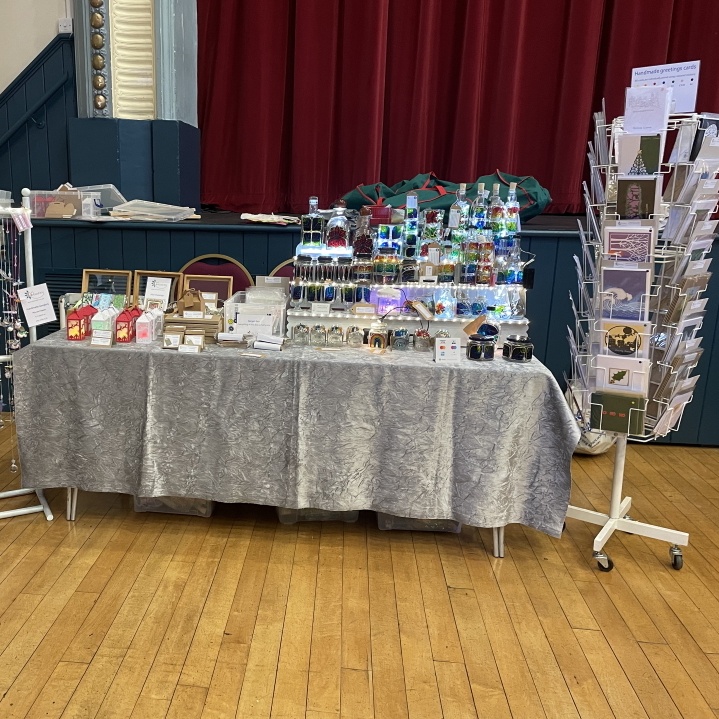
Mooshkin's stall at Criccieth Craft Fair

I will again be exhibiting at Criccieth Craft fair throughout 2023, with the possible exception of the December event as I’ve applied to attend Portmeirion’s Christmas fair this year and unfortunately the dates clash with Criccieth. If I’m accepted as an exhibitor I’ll be sure to post about it, as it’s super-exciting!

Anyway. Criccieth dates 2023 (minus the March and early April ones that have already been and gone):

  • 29 April
  • 6 May
  • 3 June
  • 1 July
  • 5 August
  • 2 September
  • 30 September
  • 4 November
  • 2 December

The venue’s location is the Memorial Hall, Criccieth, and the fairs are open to the public between 11am and 3pm. If you’d like to contact Linda, the event’s organiser, please visit the Criccieth Craft Fair Facebook page.

Posted on

Glynllifon Christmas Fair 2022

I’m ridiculously excited to have been accepted as a stallholder for Gwyl Nadolig Glynllifon Christmas Fair this year. It’ll be held on 12-13 November 2022 at Parc Glynllifon, on the A499 between Caernarfon and Pwllheli.

I don’t yet have any details about what’s happening and who else is going to be there, but once I do I’ll update this post.

This is a fantastic event which I’ve been attending as a visitor for years – there’s always loads to see and buy there – and it’s one I’ve always wanted to attend as a stallholder. Well, now I will be, so please make sure you come along and support us all!

Posted on

Dinlle Caravan Park Fun Day – 28 August 2022

I’ll be unpacking my gazebo and crossing my fingers for nothing stronger than a gentle breeze at Dinlle Caravan Park, Dinas Dinlle (near Caernarfon) on Sunday 28 August.

The event starts at 2pm and I understand it ends around 5pm. As well as a few local crafters selling their wares, there will be activities including inflatable zorbs on a track, Shetland ponies, a hog roast, dog show, tombola, auction and music – so it’ll be a fun-packed afternoon.

For more information please contact Dinlle Caravan Park via their Facebook page.

Posted on

Criccieth Craft fair – dates for September to December 2022

My favourite craft fair is the one I attend every month at Criccieth Memorial Hall. It’s a lovely little event, very well-organised and promoted. The stallholders are all lovely, and seeing them all every month is the main reason I love this little fair so much.

The craft fair is held at Neuadd Goffa Criccieth Memorial Hall, High St, Criccieth LL52 0HB from 11am to 3pm, entry is free and the dates for the final few months of 2022 are 3 September, 1 October, 5 November and 3 December. For more details visit the Ffair Grefft Criccieth Craft Fair page at Facebook.

Posted on

Why is crafting such a tough business right now?

This year I’ve noticed that it’s harder than ever to sell handmade – and having spoken to other makers, I see it’s not just me that’s having problems.

As a maker, when you have a stall at a craft fair and come home with rubbish takings, you start to question whether it’s just that your products are rubbish. You wonder if you’re wasting your time, and whether you should just give it all up and save yourself the bother. It can be really soul-destroying.

You wonder, is it the economy that’s the problem? Are people afraid to spend at the moment? The government claims that more people are in employment than ever before, but when you look closer you see that people who work 2 hours a week on a zero hours contract are considered ’employed’, so the figures are extremely misleading. Local anecdotal evidence suggests that people have either already lost their jobs or fear losing their jobs – which might explain the downturn in spending, to some degree.

And then you get a little cross at all those people who buy absolutely everything from discounter stores like B&M and Home Bargains. The need to get more ‘stuff’ for less money could well be taking cash out of the local economy and putting it in the hands of overseas shareholders. Hey, why pay for little Lleucu’s ballet lessons in Gwynedd, when you could contribute towards some anonymous overseas CEO’s umpteenth supercar?

Is it Brexit, you wonder… are people worried that leaving the EU is going to leave them worse off financially, so they’re cutting back all round? Maybe.

The thing I keep going to back to is the products I make. I have a theory about that…

I get a LOT of people complimenting my work. At craft fairs, people will stand and chat to me for ages about my pieces, especially the painted glass. They seem to love that it’s upcycled – I tell them that I turn trash into treasure, and they think it’s a great idea. And having spent 10-15 minutes chatting to me, telling me how beautiful my work is and how talented I am, they wander off empty handed.

Why is that?

My theory is that although people love to see my brightly-coloured pieces, they don’t necessarily want them in their homes… because the fashion is for neutral colours, and people seem to like following fashion (that’s not something I’ve ever understood, if I’m honest… I relish being different). Perhaps it’s human nature to be a little nervous of being a trailblazer, a trendsetter rather than a follower of trends. What if you get it wrong? What if everyone laughs at you for having something in your home that isn’t fashionable? Not the sort of thing that would bother me, but perhaps it bothers other people.

Apart from being so skint they’re forced to buy everything from Poundstretcher so they get more for their money, the fashion thing is the only reason I can think of for people telling me how much they love my work but seemingly not enough to buy it. I’ve run Facebook ad campaigns with over 100 reactions (plus comments, people tagging their friends, etc) – but no online sales since the summer either. My Etsy shop is also dead as a door nail. Why?

Is it just me?

As it turns out – no, it isn’t just me. I’ve spoken to makers all over the UK, and 98-99% of them are saying the same thing: this has been a tough year for sales, through every channel. Some are having a slightly better time of it through online channels (like Etsy for example); but craft fairs, while well-attended, seem to be more about browsing than buying. There’s a lot of visiting for inspiration going on too, by people who want to find a new hobby (or who want to set up shop as a maker themselves). That’s why I’m extremely cagey about my glass painting technique! 😉

What I can see happening before long is a lot of makers giving up and going back to being hobbyists. What a terrible shame for the handmade industry that would be. Do we really need to have more factory tat in our homes, when there are so many talented makers and artists out there struggling to make a living? Do we really need to have our homes filled with exactly the same stuff as everyone else?

So my plea to you, as we leave 2018 and head into 2019, is this: try to buy from small companies occasionally, instead of the big corporates. In my county, Gwynedd, the local council worked out a few years ago that if every adult spent £5 of their budget each week in a small business instead of a chain store, our local economy would benefit to the tune of £26m a year. That’s just one county. Imagine all the extra jobs that could create – people who would spend more money, and pay more taxes and boost the UK economy as a whole. Really makes you think – and if you can contribute towards little Lleucu’s ballet lessons, or little Dafydd’s football coaching, instead of buying yet another yacht for yet another billionaire… well, it gives you a nice warm feeling!

Please, do try to buy local whenever you can. If you visit a craft fair, buy something small. Even if you only spend £1 on my stall, when you’ve walked away I have a smile on my face and even if you can’t see it, on the inside I’m doing a little dance 🙂

Speaking of which – look out next year for a cool new ‘buy local’ campaign that I’m going to be launching. More about that another time! 🙂

In the meantime, I’m done with craft fairs for this year… I’ve managed to visit a few as a customer as well as having my own stall, and am happy to report that I’ve picked up several handmade Christmas presents (and some treats for myself) along the way. I’ll be spending the Christmas period thinking about whether I need to go in a different direction with Mooshkin – perhaps change what I’m making, or make more of an effort to sell through shops instead of direct – and we’ll see where that takes me in 2019.

Have a wonderful Christmas, all of you. May 2019 bring you everything you wish for!

Debs x

Posted on

Thoughts on glass decorating techniques

Painted upcycled small vinegar bottles

A little ‘outpouring of brain’ on the subject of glass decorating…

I hadn’t planned to write a blog post today, but while I was adding new products to the website a few things popped into my mind which I thought I’d share with you, in regard to decorating glassware.

Glassware decorated with vinyl

I’m sure that decorating glassware with stuck-on vinyl has its place in the world, but it’s not something that I can see myself getting into. Decoupage, possibly – but it would have to be in a way that’s really unique (not the same old serviettes that all the other decoupagers use, for example).

I’ve been a trader at dozens of craft fairs in North Wales over the past three years, and a visitor at dozens more. And at almost every one, there’s someone selling glassware that’s been decorated using vinyl.

But I don’t think I’ve ever seen hand painted glassware. And if I have, it’s certainly nothing like the designs you’ll find at Mooshkin.

I love that my work is so different to anything I’ve ever seen anywhere else. I believe – and hope – that it’s unique. When you buy a piece from me – especially an upcycled piece of glassware – you can be certain that you’re one of only a handful of people in the world to own something like it. Possibly the only person in the world to own that exact size, shape or design (because occasionally I’ll produce one-offs, or as near as dammit).

Compare this to vinyl-decorated glassware, which often sees many different makers producing almost identical items (how many more times can hackneyed quotes like ‘she believed she could, so she did’ find their way onto handmade goods, I wonder? Where’s the originality?) I’m in a massive crafting group on Facebook with over 100,000 members worldwide. I’m aware of just four members, including myself, who hand paint glass. But there are dozens, perhaps hundreds, of members who stick vinyl on glass – and many of them use almost identical designs.

I suppose I can see the appeal that some people might see in buying glass that’s been decorated with vinyl. It looks neater and crisper than hand painted, and it’s more uniform. Well, it would be, wouldn’t it? Printing off the same design an unlimited number of times, cutting it out and sticking it to the bottle… my personal feeling is that there’s little originality in this sort of thing, and the products end up looking like they’ve been rolled off a production line at a factory rather than looking handmade.

I don’t have a problem with that; if that’s what you like to buy, good luck to you! But personally, I prefer something that’s unique and which actually looks like someone had an original idea and took the time and made the effort of making it by hand. And ‘looking handmade’ also means embracing imperfections and irregularities. That’s why I don’t use templates when I paint my glassware – it’s all done freehand, by hand. I paint a lot of leaves, but you’ll never see two leaves that look identical – either in my work, or in nature (which is where I get my inspiration).

I should point out that I know I’m not like other people when it comes to choosing what to buy. Some people like to dress fashionably and decorate their homes according to the latest trends – which means they (and their homes) end up looking the same as everybody else. That’s fine, if that’s your thing – each to their own, and I swear I’m not judging! It’s just not for me. I buy things because I like them, not because a magazine told me that’s what I’m supposed to like; and I’m actually less likely to buy things if they seem to be what a lot of other people would own. I don’t dress fashionably, my hair was blue long before brightly coloured hair became a ‘thing’, and my home is as unusual and colourful as I am – beige and monotone are banned from my house! I celebrate my uniqueness, but if you’re happy blending into a crowd then that’s great too! 🙂

The bottom line, I guess, is this: if you’re like me and prefer really unusual products, then you’ve come to the right place! 🙂

Upcycled does not equal cheaper

I’m a firm believer that wherever possible, we should reuse instead of recycling. Although recycling is of course better than chucking rubbish into landfill, it still uses a lot of energy which harms the planet. If you can reuse an item and get a few more years’ use out of it, I really believe you should. I’ll reuse anything I can – old furniture, parcel packaging, gift wrap and ribbons (my wired Christmas ribbon collection includes some that I’ve reused for approaching 15 years!) – if I can reuse, I will.

But people do wonder sometimes why my upcycled glass isn’t sold any cheaper than my brand new glass items.

The reason is that a lot of time has to be spent in cleaning upcycled glass before I can paint on it. And when you’re a maker, time is money!

Brand new glass is often quite cheap to buy, especially if you buy in bulk.

But the time spent in soaking off labels, removing glue residue, and scrubbing glass thoroughly inside and out, means that painting upcycled glass can in some cases be more expensive than painting new glass.

Using the right materials

A final thought on the matter of decorating glass: it’s essential that you use the correct type of paint.

I overheard a couple discussing my glassware at a craft fair once, and while the woman was full of admiration for my work, her partner turned his nose up a little. I heard him whisper: “You could do that yourself with Sharpies”.

Well here’s a newsflash: using Sharpies would not give you anywhere near the same effect as my glass paints do.

First of all, the clarity and evenness of colour can’t be achieved with marker ink. The paint I use, and the technique I use for painting (which is a trade secret) mean that the colour is even, and very clear. When light shines through the paint on one of my painted glass pieces, you get pure, even, stunning colour which projects onto nearby surfaces when strong enough light is shone through it. Colours can be blended and gradated, so you’ll get (for example) a turquoise slowly becoming a dark ultramarine. This is simply not possible with Sharpies (or other marker pens for that matter).

There’s also the durability. When you use markers on glass, even when dry the ink will rub off. I’ve experimented with this just to prove the point to myself. Marker ink on glass is not durable, it’s not fade proof, and it most definitely is not weatherproof. You can’t wash it. You can try fixing it to the glass with a coat of clear varnish or clear glass paint, but this just makes the ink disappear (or at best, lose most of its pigment). It is inferior to specialist glass paint in almost every way.

So if you’re planning on giving glass painting a go yourself, make sure you invest in the right materials. My favourite brand of glass paint is Marabu GlasArt – it’s oil based, so to clean up after use you’ll need to use turps. This paint is not cheap, but it gives outstanding results… a million times better than a magic marker, in any case! 🙂

Posted on

How Dragonfly Danglers are made

Small dragonfly dangler - string of 4 - Mooshkin

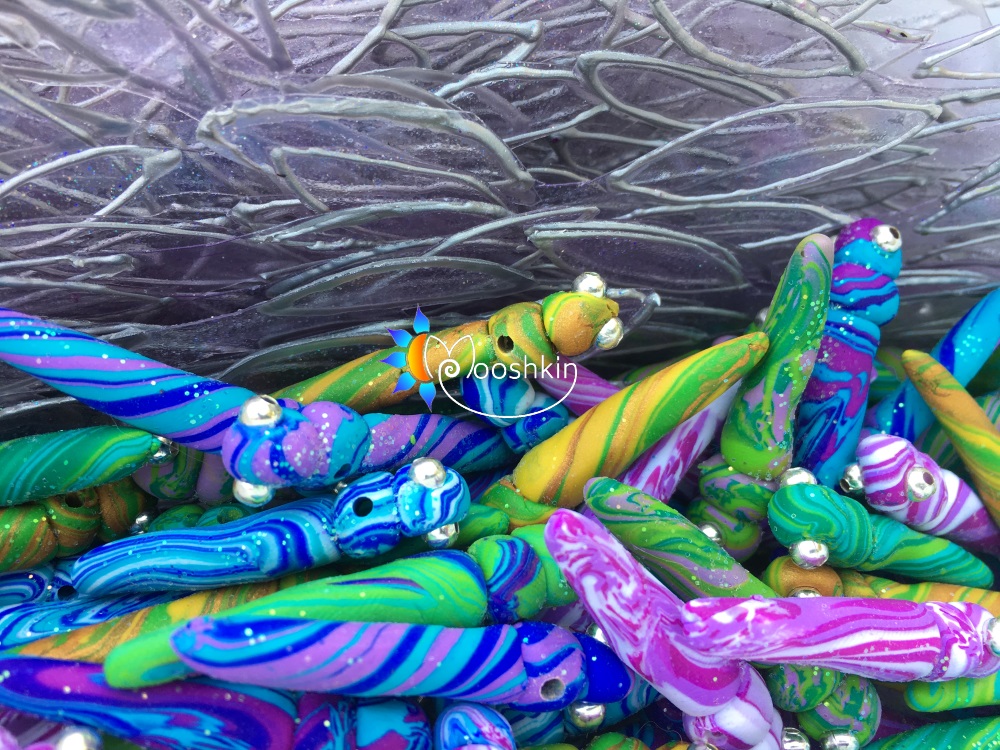
If you’ve ever seen one of my Dragonfly Danglers when you’ve visited my stall at a craft fair, and wondered ‘how does she do that?’ – you’re about to find out!

Dragonfly dangler - Mooshkin

I’m not a big fan of giving away trade secrets as I don’t particularly fancy having my products copied, so I’ll start off by saying that the purpose of this tutorial is to show people how much work goes into these Dragonfly Danglers. By all means use this tutorial to make one for yourself or as a gift, but please do not make them for commercial purposes.

Materials

I buy most of my beading supplies from Charming Beads, either through their website or their Amazon Marketplace store. They have an amazing selection of beads, crystals and other jewellery-making supplies; you’ll struggle to look at it all without buying something!

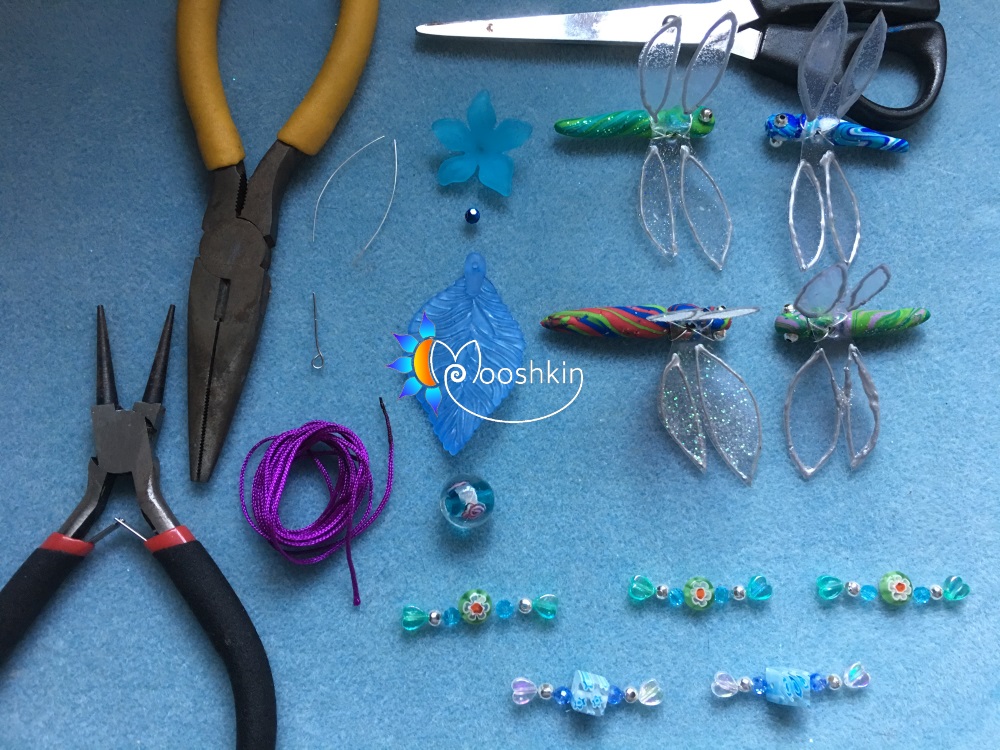
To make the dragonfly danglers you’ll need the following materials:

Tools

You need quite a few tools for this job…

  • A baking tray, covered in cooking/wrapping foil
  • A cutting tool for the polymer clay
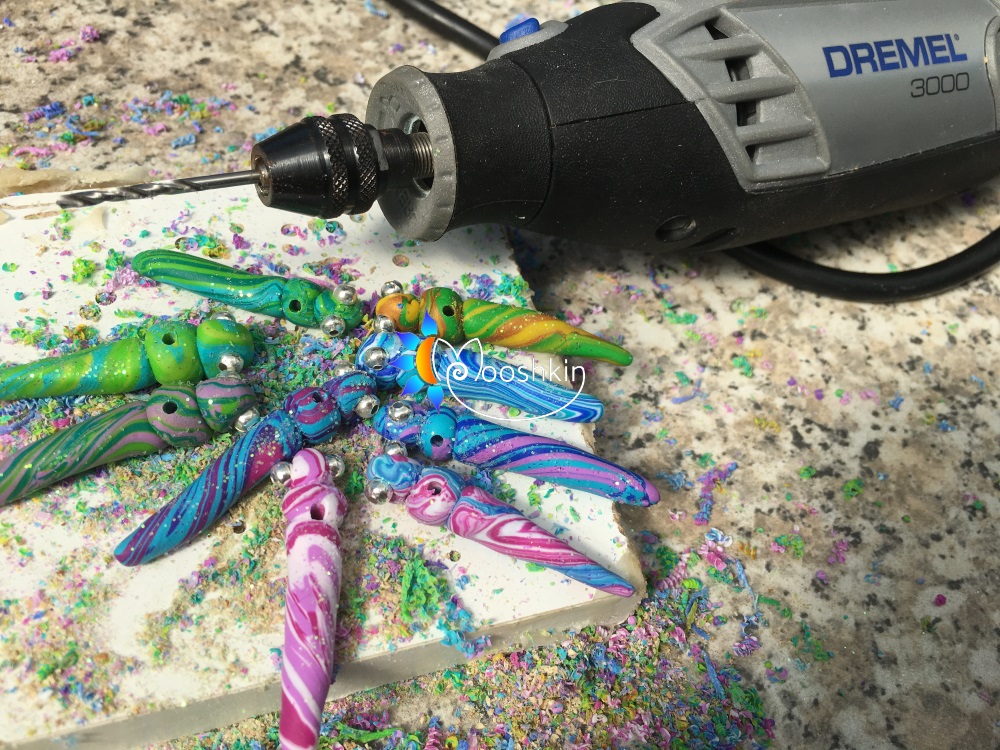
  • A craft drill with a 2mm (ish) bit (I use a Dremel 3000)
  • A biro or pencil
  • A piece of paper
  • A Sharpie pen
  • Turps (white spirit/turpentine substitute) and some kitchen roll, for removing the marker pen
  • Scissors
  • A safety pin or dressmaking pin
  • A wooden skewer
  • Wire cutters (unless you don’t mind wrecking your scissors!)
  • A beading mat (not essential but stops your beads rolling off the table)
  • Jeweller’s pliers

Method

Make the dragonfly bodies

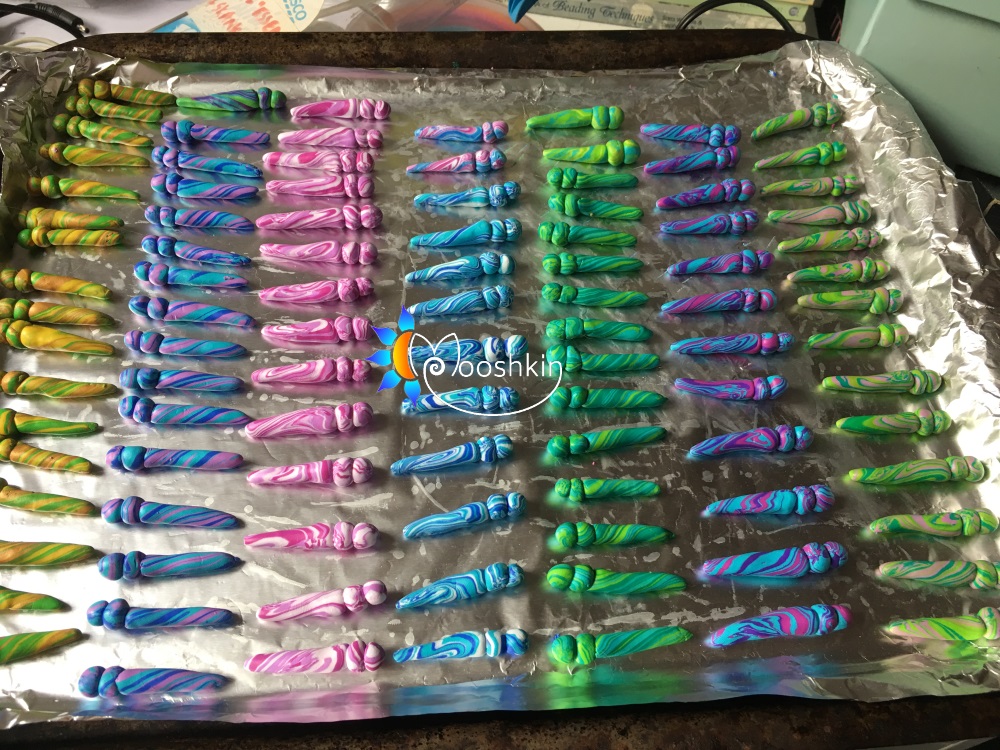
Break off equally-sized chunks from three different colours of polymer clay. Roll them into long, thin ‘noodles’ of equal lengths, and twist them together. Fold the twisted noodles in half, in half again, and in half again. Roll them together into a thick sausage, and then roll this into a thicker noodle (about the width of your little finger). You can do this several times if you like; the more you roll the clay, fold it and roll again, the better the marbled pattern will come out.

Use pea-sized pieces of the clay, rolled into balls, to make the head and middle section, then a longer piece to make the tail (the overall length of a dragonfly will be around 4cm). Push the three pieces together firmly (without squashing the two smaller pieces) and taper the tail into a point by rolling it between your fingers.

Dragonfly dangler - Mooshkin

You’ll need four dragonflies in total. You can use the same mix of colours for all four, or do as I do and make each one in different colours.

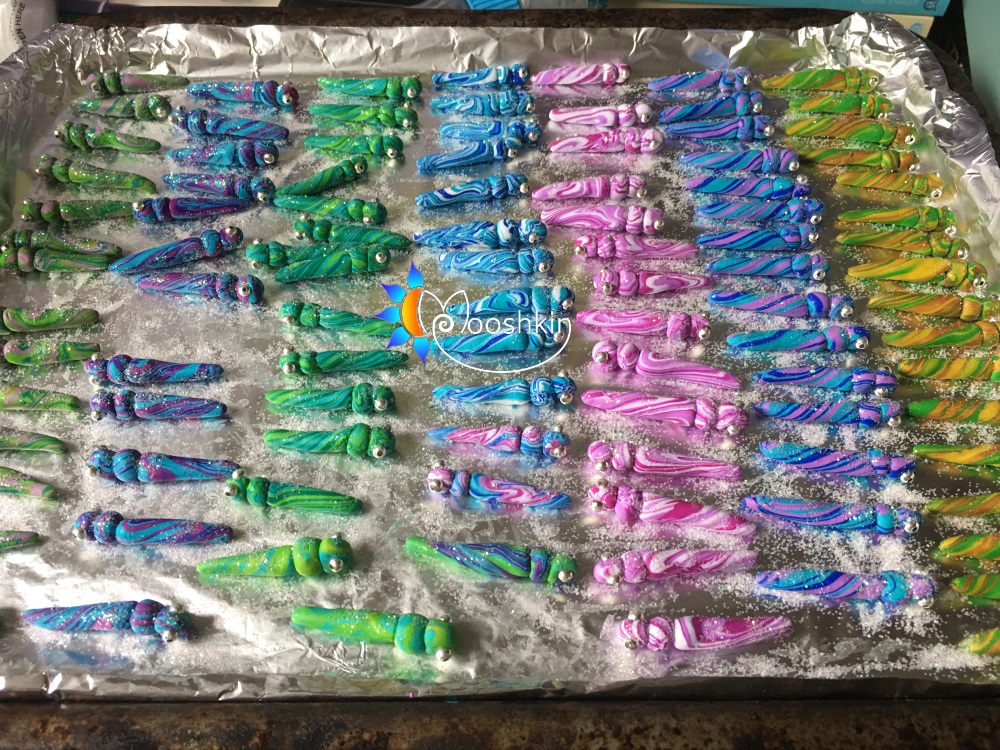
Place the dragonflies onto the foil-covered baking tray and push the eyes into the heads firmly (I use 4mm silver-coloured metal beads). Dab your finger into your pot of glitter and smear it over each dragonfly body.

Dragonfly dangler - Mooshkin

Bake the dragonfly bodies in a preheated oven at 110 celsius for 30 minutes. Remove the tray from the oven and leave to cool. When the bodies are completely cooled and the clay is firm, use a craft drill to make a 2mm hole in the middle section of each body.

Dragonfly dangler - Mooshkin

Make the wings

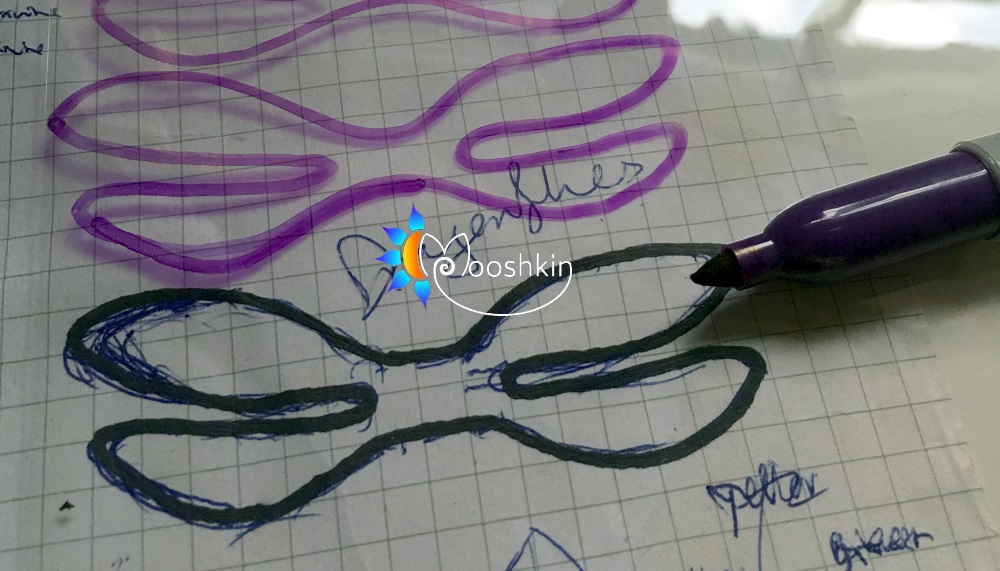
Place a dragonfly body onto a blank piece of paper and draw the wings out around it (the body helps you ensure you’re making the wings the right size). This piece of paper will be your template for making the acetate wings. I also draw a ‘back strap’ joining the wings, which acts as a guide when piping the wings onto the acetate.

Lay a sheet of acetate over the template and, using a Sharpie or other similar semi-permanent marker, draw four sets of wings.

Dragonfly dangler - Mooshkin

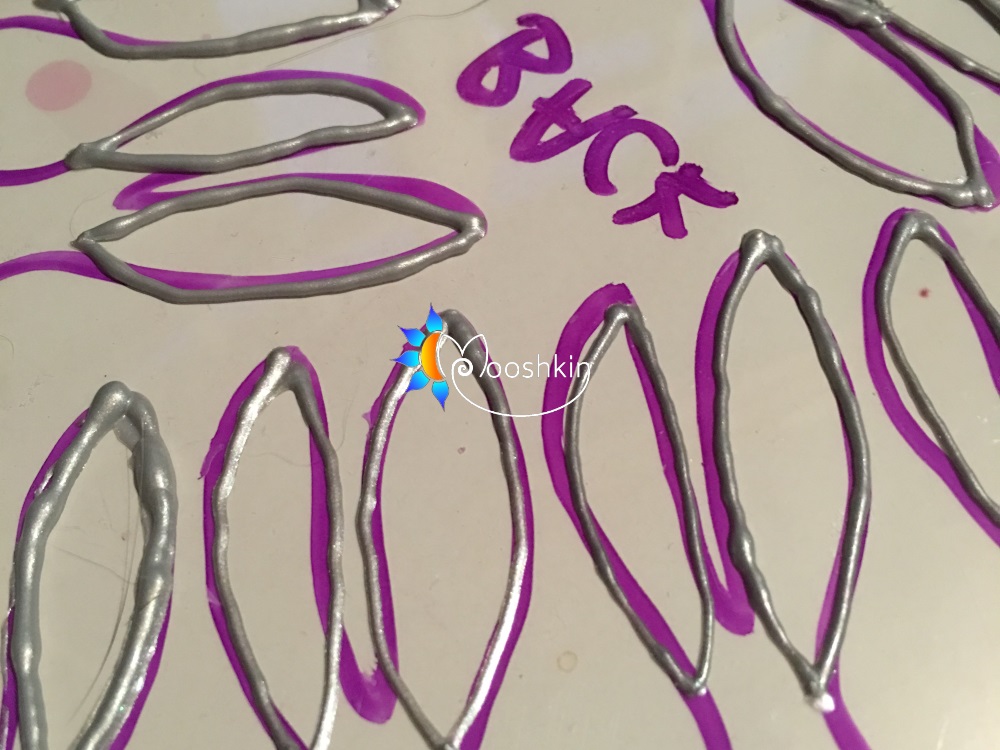
Flip the acetate sheet over, and use outline relief paste to draw the wings over the marker guides. It’s really important that you remember to flip the acetate over, otherwise you’ll never get rid of the permanent marker and your wings will be ruined. If you’ve used a ‘back strap’ on your template or the marker guides, don’t pipe these on with the outline relief paste – they’re just there to guide you.

Dragonfly dangler - Mooshkin

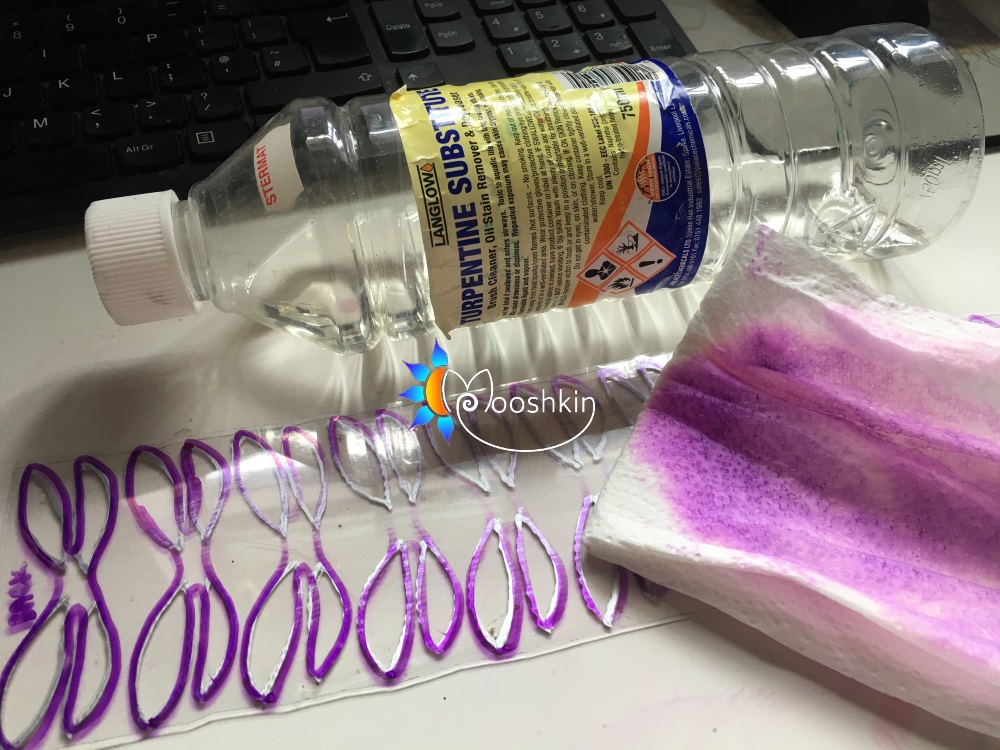
Leave the paste to dry for a couple of hours. It shrinks a little during the drying process, and darkens a little in colour. Make sure it’s fully dry and then turn the acetate sheet over and use turps on an old rag or piece of kitchen roll to remove the marker pen (you may need to rub firmly but it should all come off without too much effort).

Dragonfly dangler - Mooshkin

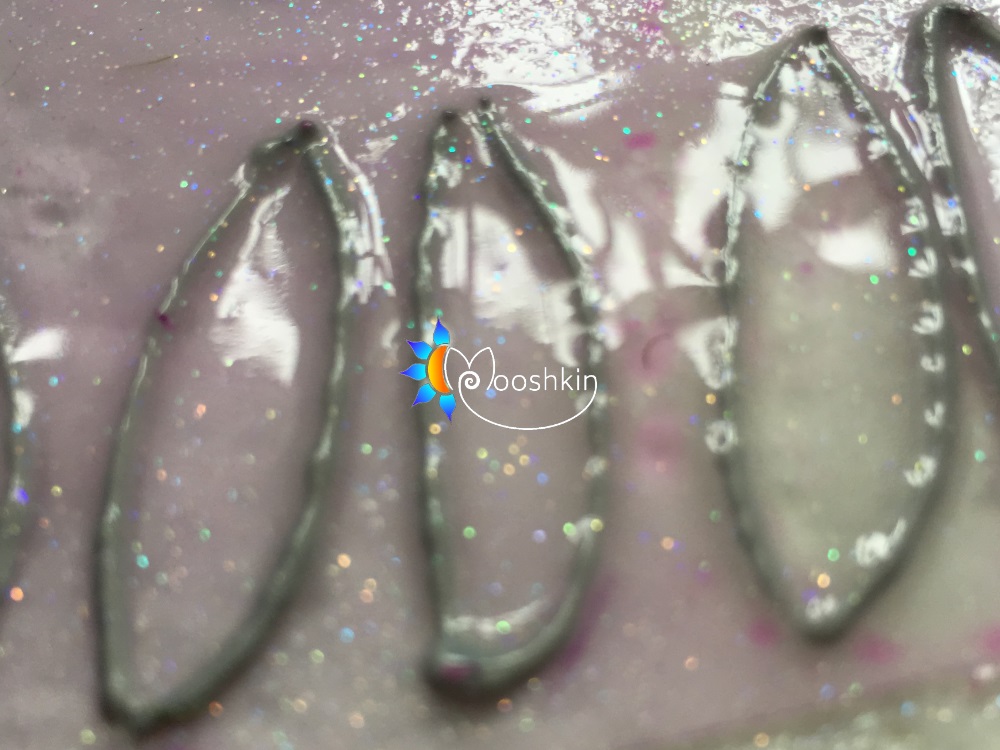
Then, turn the sheet over again so the relief paste faces upwards, and spray the wings with glitter spray (or you can use spray mount as an adhesive and sprinkle on some fine iridescent glitter instead). Leave to thoroughly dry – spray glitter/adhesive becomes clear and non-tacky when it’s fully dry, so you’ll know when the wings are ready to be cut out.

Dragonfly dangler - Mooshkin

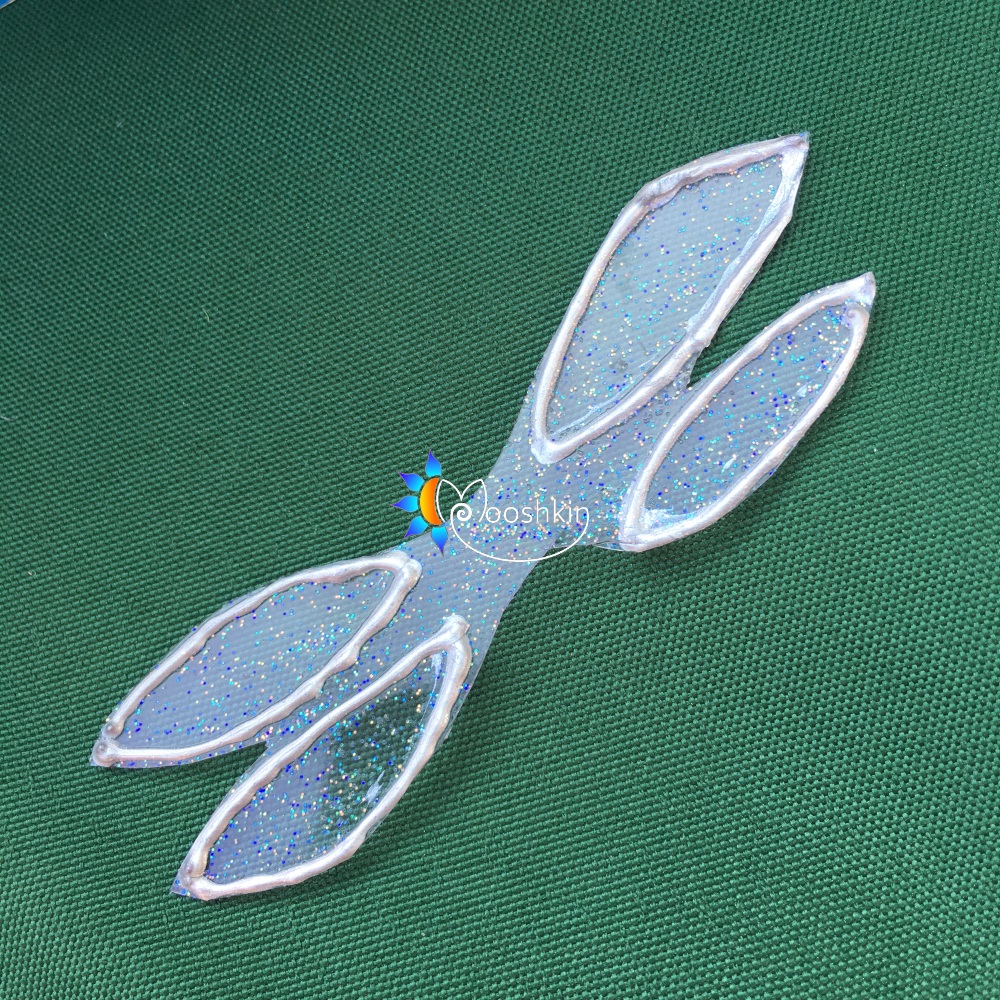
Using scissors or a scalpel, carefully cut out each set of wings, remembering to leave the ‘back strap’ in place.

Dragonfly dangler - Mooshkin

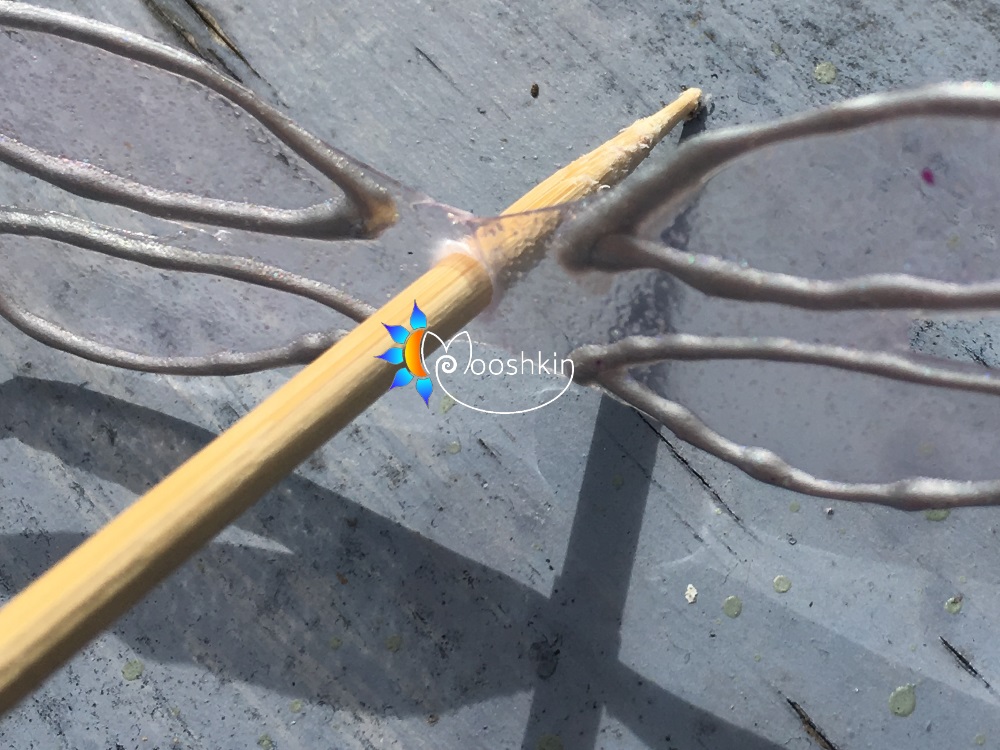
Use a pin to make a hole in the centre of the ‘back strap’, then use a wooden skewer to widen the hole. Toothpicks are a little too thin to make a decent-sized hole, so if you don’t have any wooden skewers (which are twice as thick as toothpicks) you may need to improvise.

Dragonfly dangler - Mooshkin

Assemble the dragonflies

You should now have four sets of bodies and four sets of wings, all with 2mm-diameter holes.

Dragonfly dangler - Mooshkin

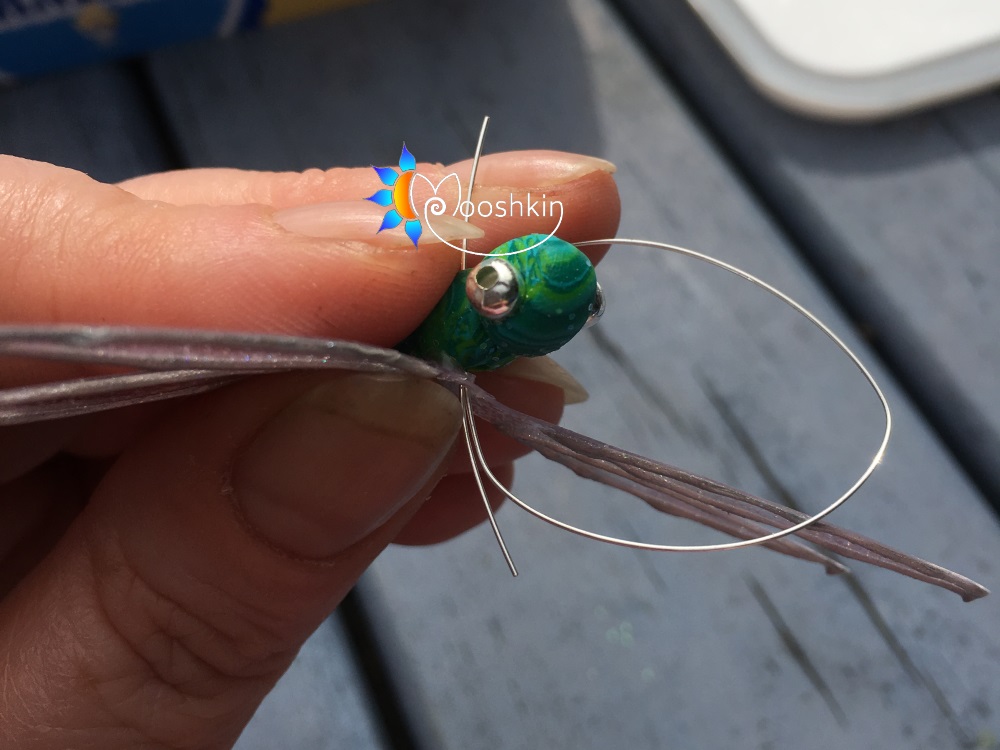
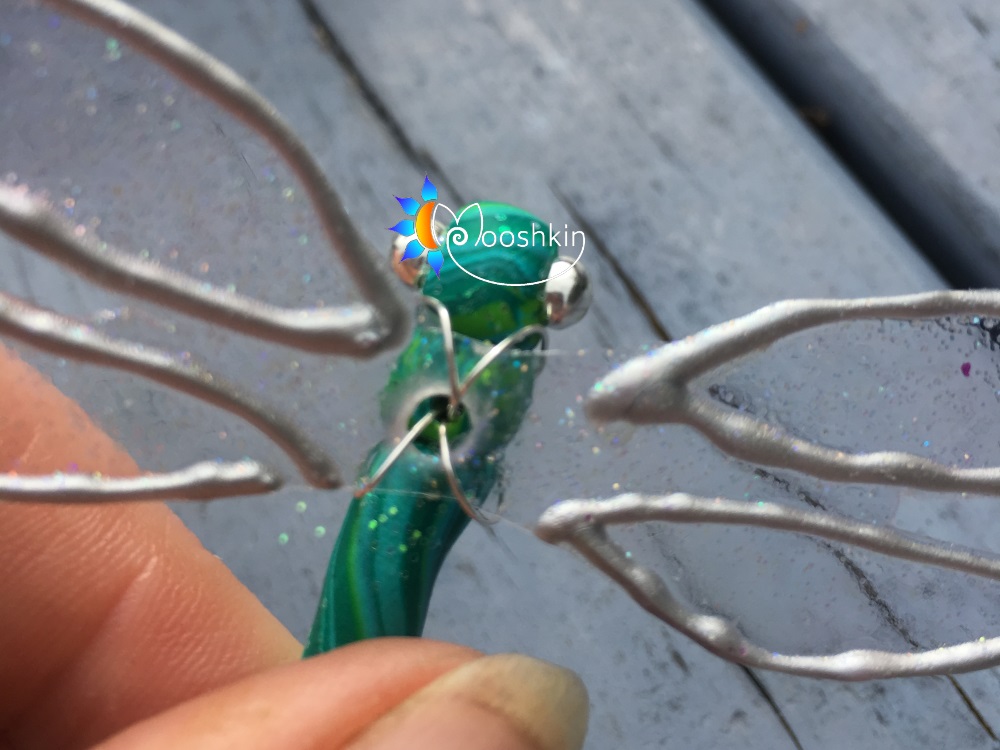
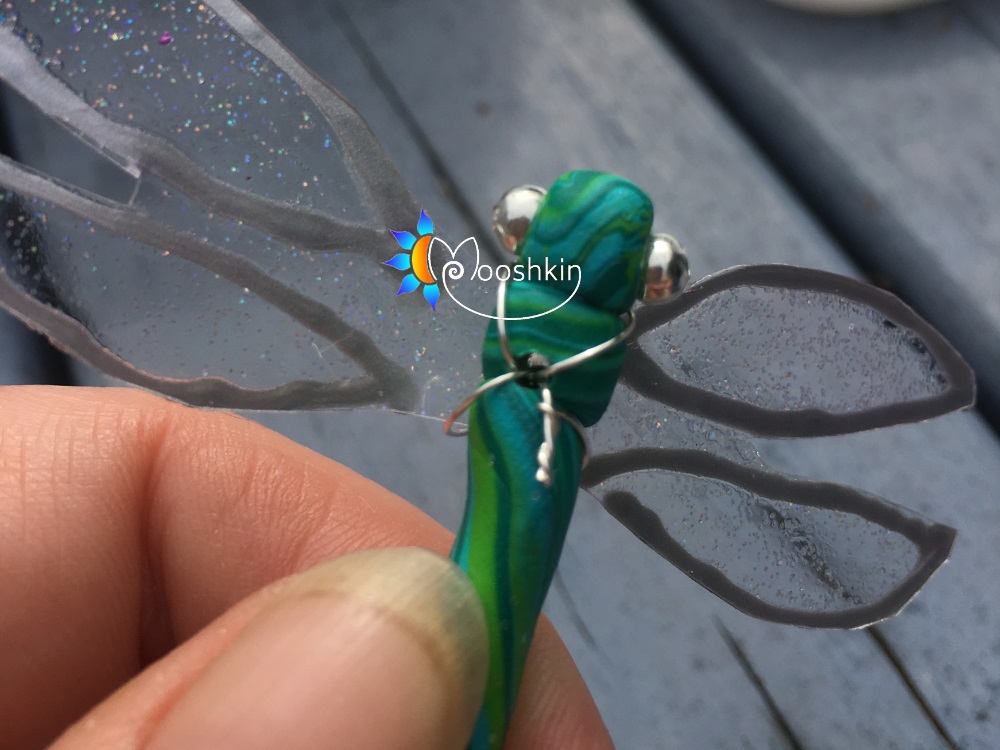
Using 0.4mm craft wire, ‘sew’ the wings onto the bodies – thread the wire through the holes and ensure you’ve gone in front of and behind both the left and right sides of the wings, until the wire forms a kind of ‘cross’ shape.

Dragonfly dangler - Mooshkin

Twist the ends of the wire together on the underside of the body, trim off anything after the first 5mm, and bend the twisted ends back along the underneath of the tail to keep them hidden.

Dragonfly dangler - Mooshkin

Bend the wings upwards a little (you could use different angles on each dragonfly).

Dragonfly dangler - Mooshkin

Make the pendant

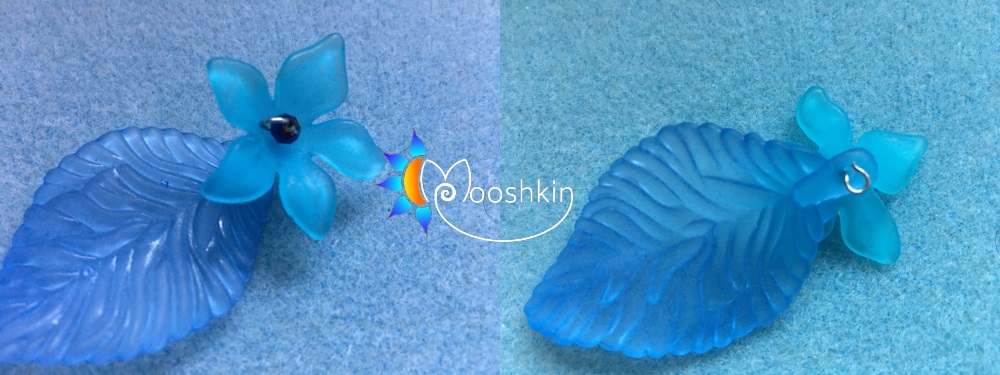
You can use all sorts of things for the pendant at the bottom of the Dragonfly Dangler. If you have a large crystal going spare, use that; or perhaps a small brass bell, or a large fancy bead (or a few). The aim really is to add a little weight to the bottom of the thread, helping it to hang nicely. In this tutorial I’m using lucite (acrylic) flowers and leaves and a small Czech crystal, which I’ve joined together using an eye pin.

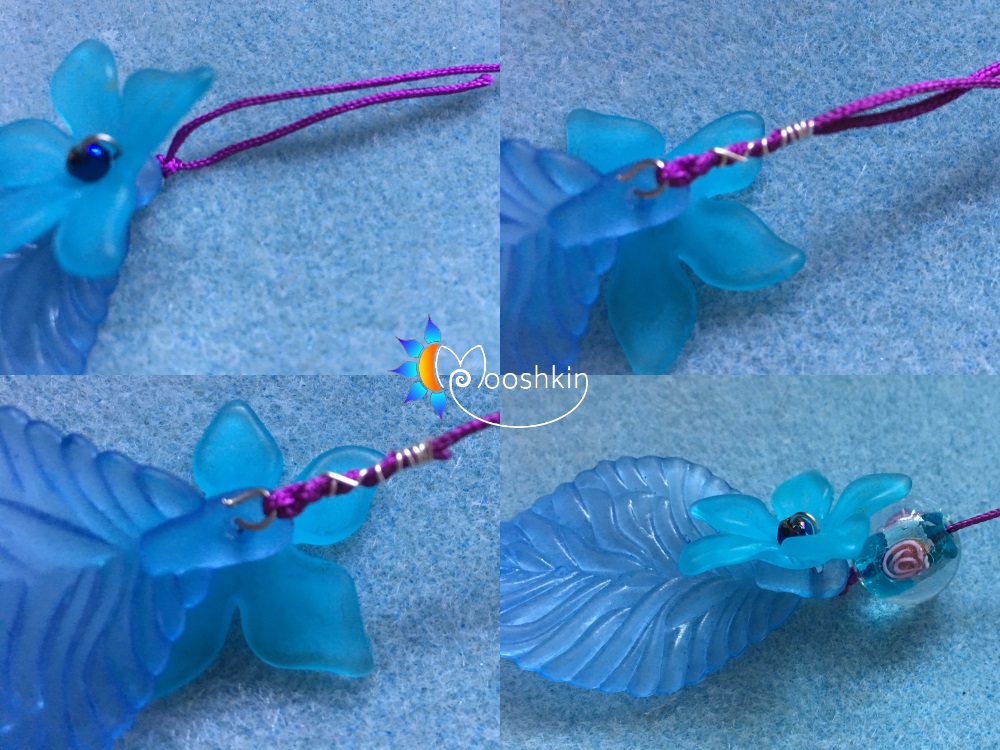
The eye of the pin is at the back of the leaf; the pin then goes through the back of the flower and into the crystal. I loop the non-eye end of the pin using jeweller’s pliers, to secure the crystal in place. Then, I bend the eye of the pin so that it sits flush against the back of the leaf.

Dragonfly dangler - Mooshkin

Assemble the Dragonfly Dangler

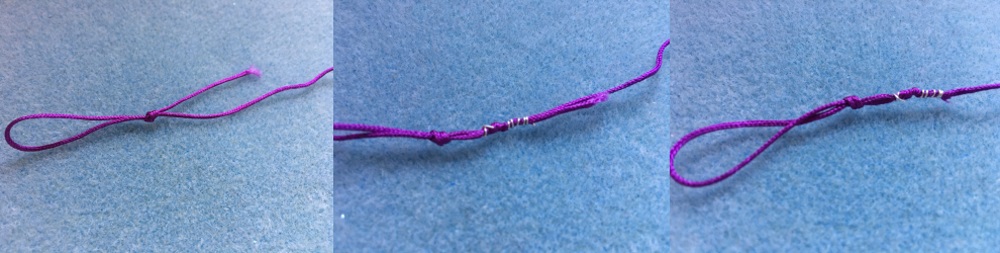
Cut a 1m length of 1mm-thick nylon rattail thread and push one end through the eye of the pin. Tie it in a double knot, firmly. Lay the end along the remaining length of the thread, and wrap a small piece of the 0.4mm craft wire around the threads to secure them together. This stops the knot from working itself loose, and after trimming the excess off the shorter length of thread as close to the wire as possible, you’ll get a much neater result.

Use a large, fancy bead with a large-ish hole to cover as much of the wire as possible.

Dragonfly dangler - Mooshkin

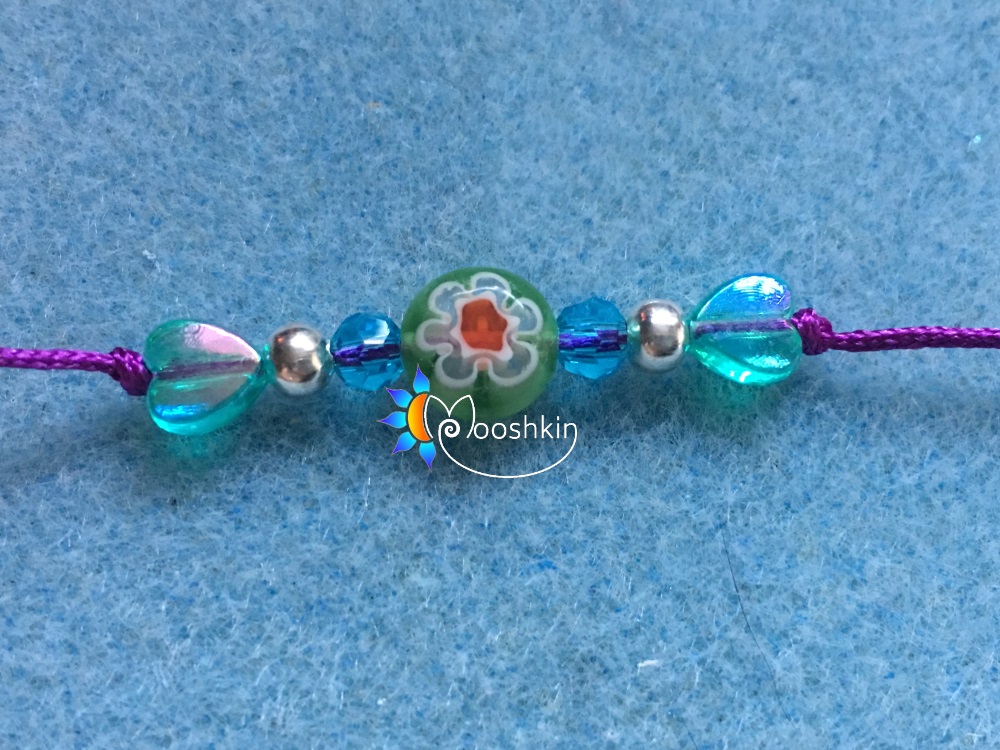
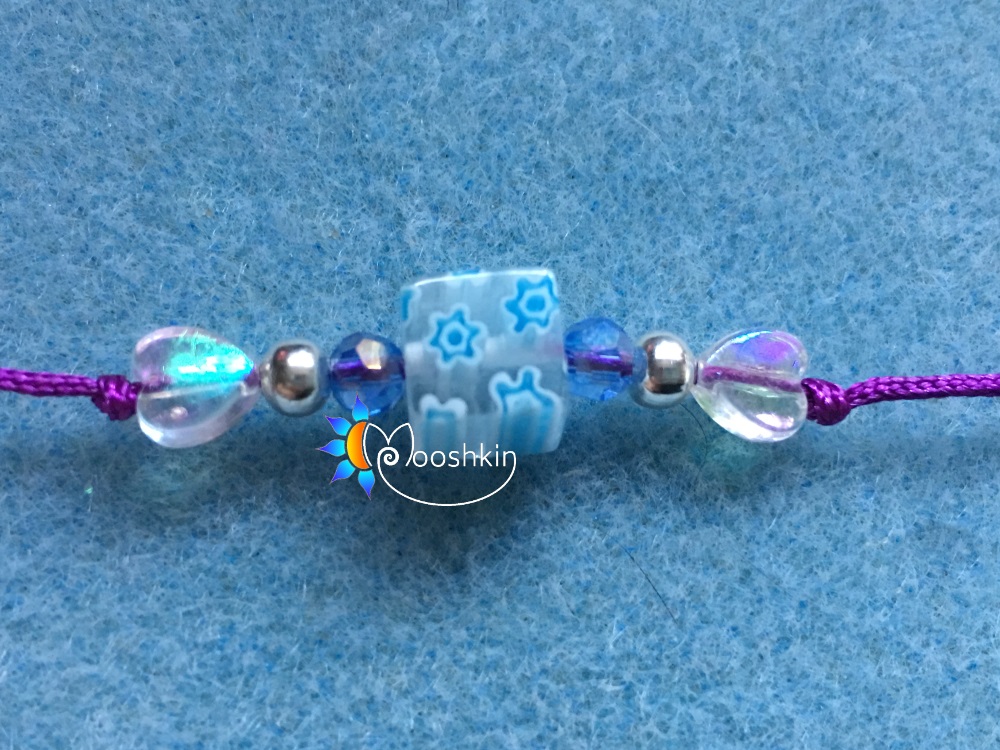
Decide on a colour scheme or two for your remaining beads. For each beaded section of the dangler I use 7 beads, but you can use more or fewer if you want. There are five beaded sections in total if you’re using four dragonflies. It helps to lay out your beads on a beading mat before you start threading them, so you can experiment with different layouts.

Dragonfly dangler - Mooshkin

Melt the end of the thread with a lighter and roll the thread between your fingers, so that it takes on a firm, needle-like appearance. This will make threading the beads much easier.

Tie a single knot about 1.5-2 inches above the fancy bead at the bottom of the dangler. Thread the first of your bead sections, and secure it in place with another single knot as close as you can get it to the last bead in the section.

Dragonfly dangler - Mooshkin

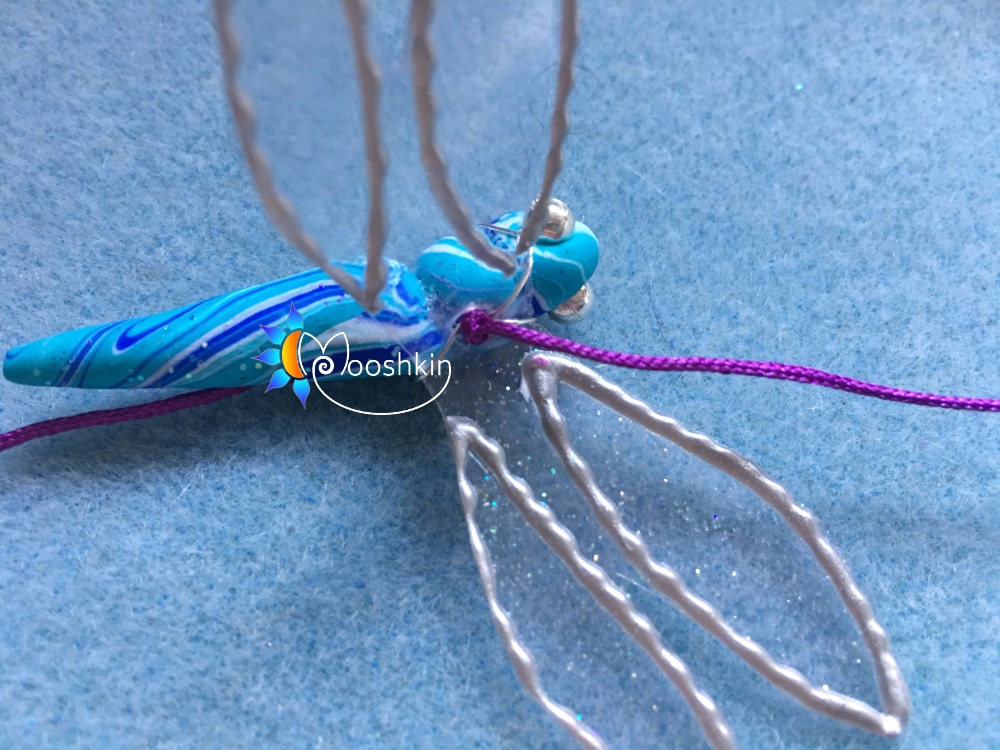
Tie another single knot about 1.5-2 inches above the first bead section, and thread a dragonfly from its underside upwards. Secure it in place with another single knot.

Dragonfly dangler - Mooshkin

Repeat this process until all beads and dragonflies have been threaded. If you’re using four dragonflies, your layout will be:

beads-dragonfly-beads-dragonfly-beads-dragonfly-beads-dragonfly-beads

Dragonfly dangler - Mooshkin

When the final bead section has been knotted into place, form a loop with the remaining thread and knot it firmly. Again lie any excess thread along the main thread and secure it in place with wire, cutting off any excess below the bottom of the wire.

Dragonfly Dangler - Mooshkin

That’s it – you’ve made a Dragonfly Dangler!